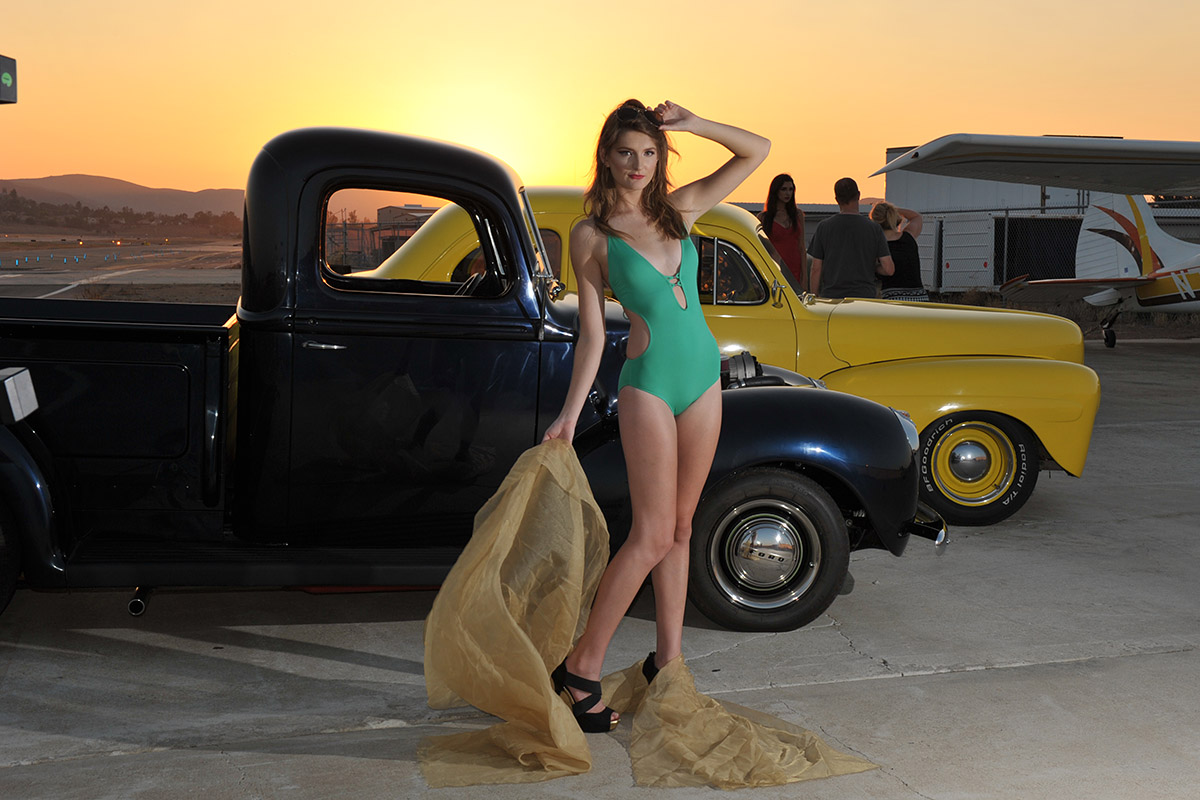
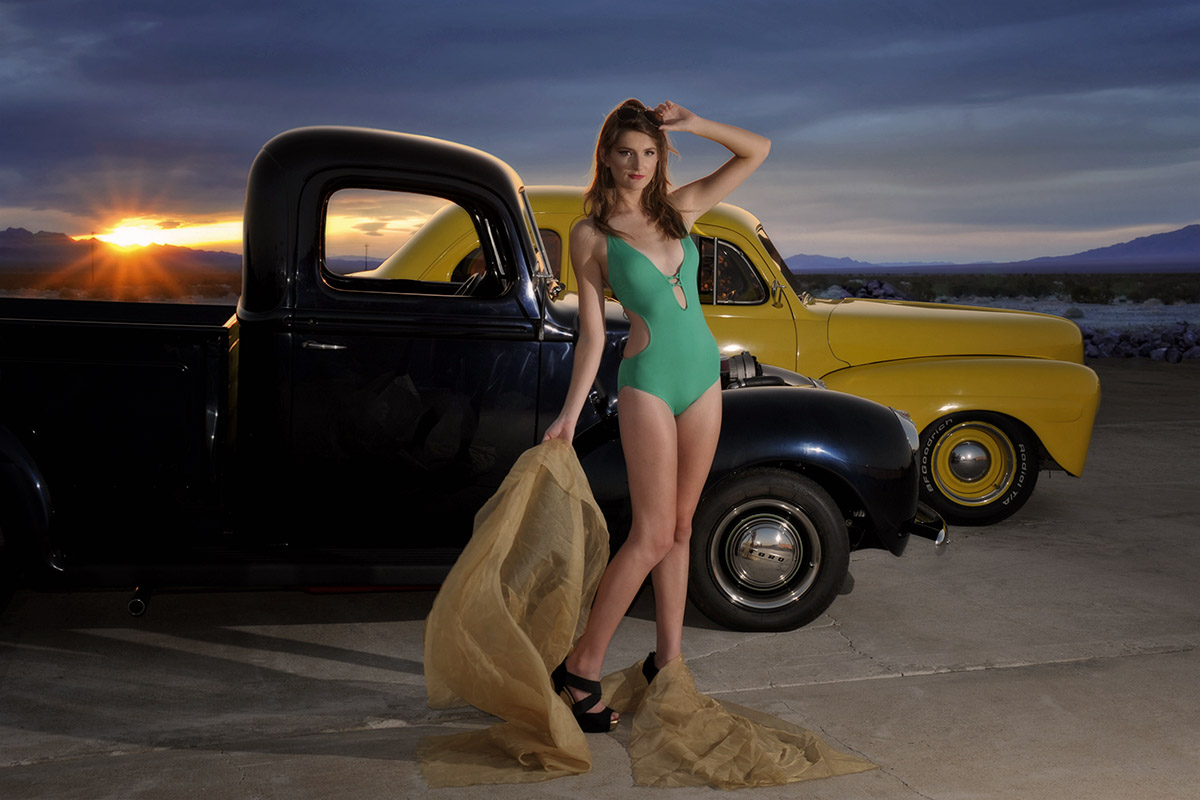
Time for a show and tell post. Here's a recent model shot that needed work due to distracting objects and other people in the scene. I wish I could have kept that wonderful sunset color, but the replacement sunset has its own merits. The location is a small airport in El Cajon, CA.
Masking an image always seems an adventure: I used CS6's Refine Edge tool, which is pretty powerful once you learn it (just read Photoshop Compositing Secrets by Matt Kloskowski). The background is a shot I got in the Arizona desert a few years ago. Transitioning it to the airport's concrete tarmac was a challenge; I think it looks 'ok', but I darkened it just in case, so to draw attention away from it. Adding glow to the back of the pickup cab was definitely the hardest part - and maybe not the strongest work - as it needed a little light to make it believable (the added sun would have illuminated it in real life).
Anyway ,... about 1.5 hours of work here.
gb
Attachment 93083
Attachment 93084
Before and After
Printable View
-
08-26-2014, 08:03 PMGB1Before and After
-
08-29-2014, 04:49 PMplugsnpixelsRe: Before and After
That's a great shot even before editing and a very believable job overall afterwards.
The only teeny area that's not working for me is the highlighting on her hair (looks "cut out"). By extension, the rim lighting on the roof of the truck and car are fine but that lighting does not match the sunset in terms of direction and intensity.
A remedy for these things is to insert a sunset photo similar to the original scene where the sun is at the center, OR just edit out the distractions and rebuild that area using color from the original sky/ground.
This is a good example of a situation where digital terrain software comes in handy, i.e., you can custom-build your sky and background terrain to order and slip it in. -
09-02-2014, 06:16 AMJesusRamosRe: Before and After
was beautiful, I like
-
09-02-2014, 08:58 AMGB1Re: Before and AfterThanks PNP. Yeah, I do like the original sky, just had a difficult time removing the people and other stuff from the right side. It was ultimately easier to use a completely different background pic. I agree that it would be best to use one w/ a centered sun. Don't like her hair? I thought that even though the sun was now to the side that it might still make her hair like that -- maybe not.Quote:
Originally Posted by plugsnpixels
I think I will keep the original in mind and use that sky color for a future project.
Question - If I had just posted this, would you have known something was amok, or would it be convincing? Sometimes it takes people like us to see that something's not real.
G -
09-02-2014, 06:13 PMGrandpawRe: Before and After
Very nice work, I like it!!!!
-
02-20-2015, 08:24 AMleonamaloneyRe: Before and After
Nice job, i like it!!
-
03-26-2015, 06:28 AMseachefRe: Before and After
Cool! It's beautiful.I'm interested her in your photo.
-
03-27-2015, 09:02 AMAlistairyRe: Before and After
looks very bright, colourful ;)
-
07-04-2019, 12:53 AMjogeshocpRe: Before and After
A great job is done. Looks so beautiful and color adjustment is just perfect.